9 minute read · April 15, 2022
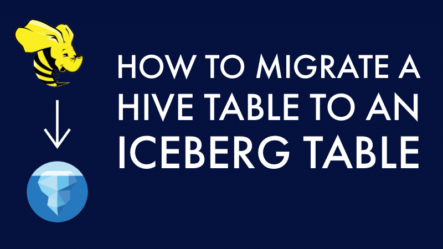
How to Migrate a Hive Table to an Iceberg Table

· Senior Tech Evangelist, Dremio
by Alex Merced, Developer Advocate at Dremio
So, you’ve heard about the trend that data lakes are migrating to Apache Iceberg as their table format. You’ve heard how Apache Iceberg can enable ACID transactions, partition evolution, schema evolution, time travel, version rollback, concurrent writing, and more on your data lake. If you aren’t familiar with Apache Iceberg read this great deep dive into its architecture.
This all sounds great, but all your existing data lake tables are currently in the legacy Hive format and you’d like to know how best to migrate this data. In this article, I hope to illuminate the differences between the two migration options, along with the benefits and drawbacks of each approach:
- in-place migration
- shadow migration
After reading this article laying out the principles of migrating make sure to checkout this article with a hands-on exercise to see these steps in action.
Option 1: In-Place Data Migration of Hive Tables
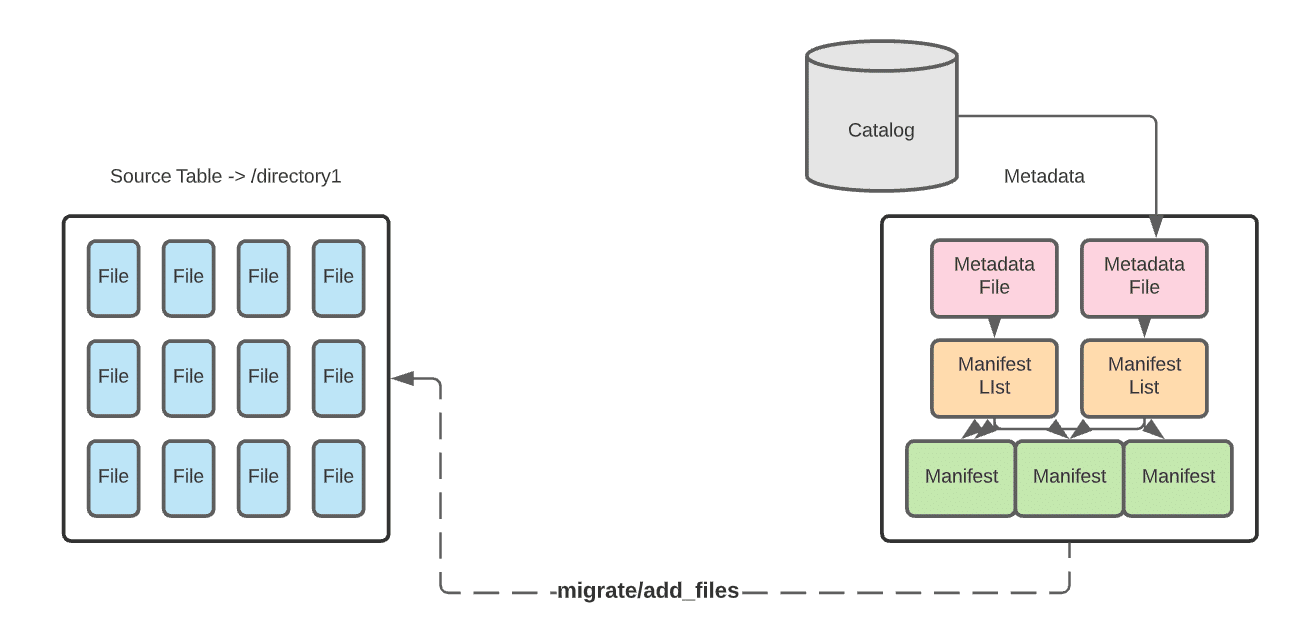
In-place data migration avoids rewriting the data. Instead, you write new Apache Iceberg tables that comprise the already existing data files in your data lake.
In-Place Benefits
- In-place migration can be less time-consuming as all the data won’t be restated.
- If there is an error in writing the Iceberg metadata, you only need to re-write the metadata, not the data as well.
- Data lineage is preserved, as the metadata from the pre-existing catalog still exists.
In-Place Drawbacks
- If data is added to the dataset during the metadata write you’ll need to reattempt to include the new data.
- To prevent having to reattempt this operation you’ll have write downtime, which may not be feasible in some situations.
- This approach won’t work if any of the data needs to be restated.
To allow for this kind of migration, Iceberg has several procedures built into its Spark extensions. Which procedure you should use will be based on whether you are using a Spark Catalog.
To replace an existing Hive table, making it an Iceberg table
Use the migrate procedure to write a new table using the source table’s data files. The new Iceberg table uses the same data files as the source Hive table. Ideally, first you’d create a temporary test table using the snapshot procedure and then use the migrate procedure when ready to migrate. The source data files must be Parquet, AVRO, or ORC.
To add the data files from an existing Hive table to an existing Iceberg table
Use the add_files procedure. This procedure adds the existing data files in the source Hive table to an existing Iceberg table with a new snapshot that includes the files. The source Hive table and the destination Iceberg table will both be referring to the same data files.
Option 2: Shadow Migration of Hive Tables
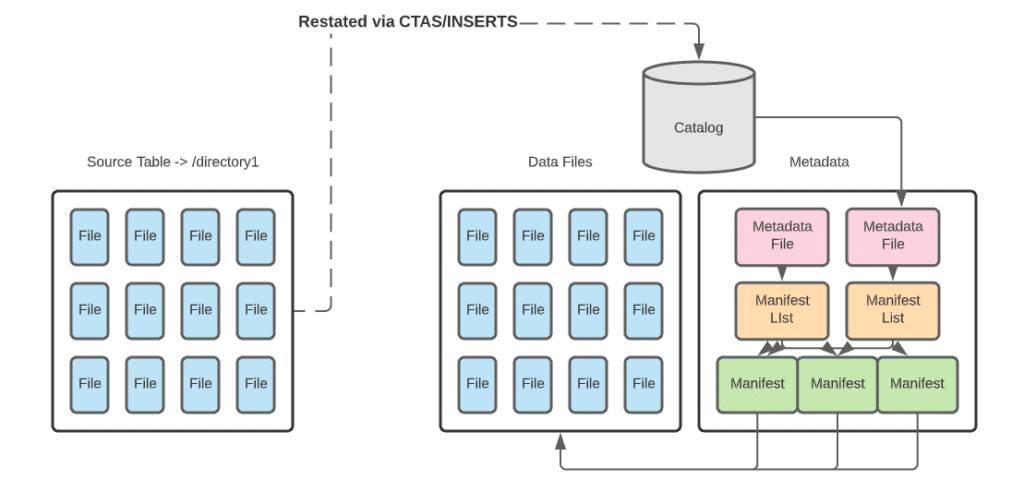
With a shadow migration you are not only creating a new Iceberg table and all the metadata that comes with it, but also restating all data files. This new table is known as the shadow. It becomes the main table once all data is in sync. For larger datasets, you may want to restate them in batches. This approach will have its own set of pros and cons
Shadow Benefits
- Shadow migration allows you to audit and validate the data, as the data files must read to be restated.
- You’re able to apply schema and partition changes up front.
- Data corruption issues are unlikely, as data is audited, validated, and counted through the migration process.
Shadow Drawbacks
- You will double the storage for the dataset, as you will store both the original table and the new Iceberg table. (You will retire the old table once the migration is complete, so it’s a temporary issue.)
- Because you are writing data and metadata, this migration path can take much longer than in-place migration.
- It is difficult to keep tables in sync if there are changes to the original table during the migration. (This issue is also temporary, as syncing updates won’t matter after you retire the original table at migration completion.)
For smaller datasets, restating a table in whole can easily be done with CTAS statements. For larger datasets, you may want to restate an initial batch of data with a CTAS statement and follow up with batched inserts until the entire source is ingested into the new table.
Architecting the Migration
Whether you restate the data with a shadow migration or avoid restating the data with an in-place migration, the actual migration process needs careful architecture.
In general, it should go through a four-phase process:
- As the process begins, the new Iceberg table is not yet created or in sync with the source. User-facing read and write operations remain operating on the source table.
- The table is created but not fully in sync. Read operations are applied on the source table and write operations are applied to the source and new table.
- Once the new table is in sync, you can switch to read operations on the new table. Until you are certain the migration is successful, continue to apply write operations to the source and new table.
- When everything is tested, synced, and working properly, you can apply all read and write operations to the new Iceberg table and retire the source table

As you progress through these phases, be sure to check for consistency, logging errors, and logging progress. These checks can help you manage quality, troubleshoot, and measure the length of the migration.
While Iceberg’s procedures and CTAS statements give you a simple path to migrating existing Hive tables, the true art is in architecting your migration plan to minimize or eliminate disruption. Follow the advice in this article to have a solid migration plan and you’ll be enjoying the benefits of Apache Iceberg on your data lake in no time.
